Now we will create our first JSR 286 Portlet.
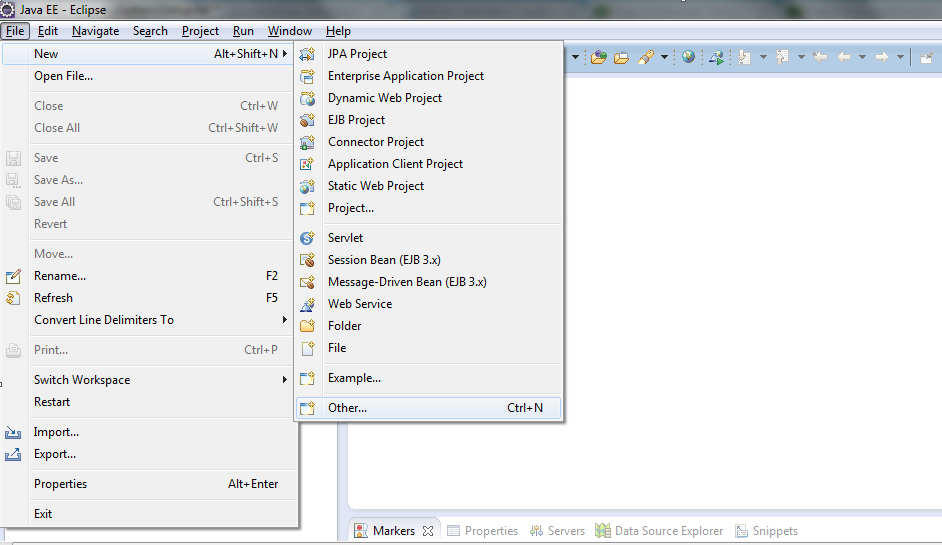
1. In Eclipse navigate and go to File->new->other.
2. Type Maven.

3. Next type web and select maven-archetype-webapp
4. Type FirstPortlet next
5. Update your pom.xml file to add the following dependencies:
<dependencies>
        <dependency>
            <groupId>javax.servlet</groupId>
            <artifactId>servlet-api</artifactId>
            <version>2.5</version>
        </dependency>
        <dependency>
            <groupId>javax.portlet</groupId>
            <artifactId>portlet-api</artifactId>
            <version>2.0</version>
            <scope>provided</scope>
        </dependency>
        <dependency>
            <groupId>javax.servlet</groupId>
            <artifactId>jstl</artifactId>
            <version>1.1.1</version>
        </dependency>
        <dependency>
            <groupId>junit</groupId>
            <artifactId>junit</artifactId>
            <version>3.8.1</version>
            <scope>test</scope>
        </dependency>
    </dependencies>
If you are only interested in the Portlet you can skip the section below and directly go to the Portlet creation section. Below I have demonstrated how a simple servlet can be created and deployed in the tomcat bundle.
Sample Servlet:
In the Portlet Application open the web.xml file. Its located in /webapps/WEB-INF/web.xml :
Add/Update the following.
<servlet>
    <servlet-name>SampleServlet</servlet-name>
    <servlet-class>com.code.servlets.SampleServlet</servlet-class>
</servlet>
<servlet-mapping>
    <servlet-name>SampleServlet</servlet-name>
    <url-pattern>/testservlet/*</url-pattern>
</servlet-mapping>
<servlet-mapping>
    <servlet-name>SampleServlet</servlet-name>
    <url-pattern>/testservlet</url-pattern>
</servlet-mapping>
2. Create the Servlet class
Create a new package com.code.servlets in the main/java folder.
Your package hierarchy should look like the one below

Create a new class in this package. Call it SampleServlet.java
Create a Servlet class to handle the request Refer to the code below:
package com.code.servlets;
import java.io.IOException;
import javax.servlet.ServletException;
import javax.servlet.http.HttpServlet;
import javax.servlet.http.HttpServletRequest;
import javax.servlet.http.HttpServletResponse;
public class SampleServlet extends HttpServlet{
private static final long serialVersionUID = 1L;
public void doGet(HttpServletRequest request, HttpServletResponse response) throws ServletException, IOException{
request.getRequestDispatcher("/WEB-INF/jsp/home.jsp").forward(request, response);
}
}
Also create a JSP file home.jsp with some welcome message. This completes the sample Servlet.
Create the Portlet
Now we create the Portlet. Here is the Portlet class MainControllerwhich extends GenericPortlet.
package com.code.controller;
import java.io.IOException;
import javax.portlet.GenericPortlet;
import javax.portlet.PortletException;
import javax.portlet.PortletRequest;
import javax.portlet.PortletResponse;
import javax.portlet.RenderMode;
public class MainController extends GenericPortlet{
/*Using Annotation for invoking the render method for View mode*/
@RenderMode(name = "view")
public void render(PortletRequest request, PortletResponse response) throws PortletException, IOException{
getPortletContext().getRequestDispatcher("/WEB-INF/jsp/main.jsp").include(request, response);
}
}
Also create a main.jsp file which is a simple JSP with some welcome message.
We will need three XML files. The main one is portlet.xml file which identifies an application as a Portlet Application.
Below is the portlet.xml I have used for this application
<portlet>
    <portlet-name>FirstPortlet</portlet-name>
    <portlet-class>com.code.controller.MainController</portlet-class>
    <init-param>
        <name>owner</name>
        <value>Ankur</value>
    </init-param>
    <expiration-cache>60</expiration-cache>
    <cache-scope>private</cache-scope>
    <supports>
        <mime-type>text/html</mime-type>
        <portlet-mode>view</portlet-mode>
        <portlet-mode>edit</portlet-mode>
        <portlet-mode>print</portlet-mode>
        <portlet-mode>help</portlet-mode>
        <window-state>pop_up</window-state>
    </supports>
    <resource-bundle>Language-ext</resource-bundle>
</portlet>
We also need two more XML files which are specific to Liferay.
liferay-portlet.xml, liferay-display.xml
We are all set to deploy and test our first application.
Build and Deploy:
- If you have the Eclipse Maven plugin then you can build this application from Eclipse itself.
- Just right click go to Run As -> Maven Build. In the Goals box enter clean install.
- Go to JRE tab and select the alternate JRE, the custom JDK on your machine.
- Click on Run. Maven will create the war file which can be hot deployed to Liferay server.
- Just refresh your project once build is complete and copy the war from target folder.
- Place this in the deploy folder of your Liferay bundle.
Now start the server.
Sign in to the Portal using test@liferay.com / test and then add a new Page. On this page add the FirstPortlet Portlet.
You can test the servlet by going to: http://localhost:8080/FirstPortlet/testservlet
We also need two more XML files which are specific to Liferay.
ReplyDeletewhat is the content of this two files?
and what if I am deploying this to the jboss portal, I dont need them right?
which xmlns have you used for this portlet.xml?
ReplyDeleteplease can you add more detail in how to deploy it on the jboss portal?
Thanks